
When planning a garden retaining wall, there is more to consider than simply choosing the right materials and deciding on its appearance. One of the most important aspects of retaining wall construction is drainage. Without an effective drainage system, water can accumulate behind the wall, increasing pressure on the structure and potentially causing damage over time.
Whether you are creating a small raised planting bed or transforming a sloping garden with multiple levels, understanding how water moves through your garden and how it should be managed is essential. A well-designed garden retaining wall drainage system helps prevent water build-up, protects the structural integrity of the wall and ensures your newly created garden levels remain stable.
But how does drainage behind a garden wall actually work? What materials are needed, and where does the collected water go? In this guide, we explore the different elements of retaining wall drainage, the materials commonly used, potential problems to look out for and what needs to be considered when planning and installing an effective drainage system.
Image credit: Stonecenters.com
Why Is Drainage Important for Garden Walls?
Drainage is one of the most important considerations when constructing a garden retaining wall. While the wall itself is designed to hold back soil and manage changes in ground level, it must also withstand the additional pressure created by water. When rainfall enters the soil behind a retaining wall, some of it naturally drains away through the ground. However, depending on the soil type, ground conditions and surrounding landscape, water can become trapped behind the structure.
This is particularly common in gardens with heavy clay soils, where water drains away much more slowly than it would through lighter, more permeable ground. As water accumulates, it creates hydrostatic pressure against the back of the wall. This is additional pressure that the structure must withstand, potentially increasing the risk of cracking, bulging, leaning or, in more severe cases, complete structural failure.
An effective garden wall drainage system helps prevent this build-up by providing a route for excess water to escape. Incorporating drainage into your retaining wall construction offers several important benefits:
- Reduces water pressure by allowing excess groundwater and rainfall to escape, minimising the hydrostatic pressure acting against the wall.
- Protects structural stability by helping to minimise the risk of movement, cracking and structural damage caused by water accumulation.
- Prevents waterlogging by reducing the likelihood of saturated soil building up behind the wall and helping to protect nearby planting areas.
- Improves longevity by limiting prolonged exposure to moisture and reducing the risk of premature deterioration of construction materials.
- Reduces maintenance by helping to prevent recurring drainage problems that could otherwise lead to costly repairs.
Image Credit: Eric Piasecki
Understanding the Different Elements of a Garden Wall Drainage System
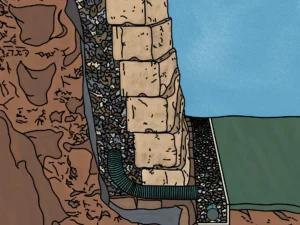
A retaining wall is made up of several components, each playing an important role in supporting the structure and managing water movement. Below, we break down the different elements shown in the diagram and explain how they work together to help maintain a stable, well-drained terraced garden.
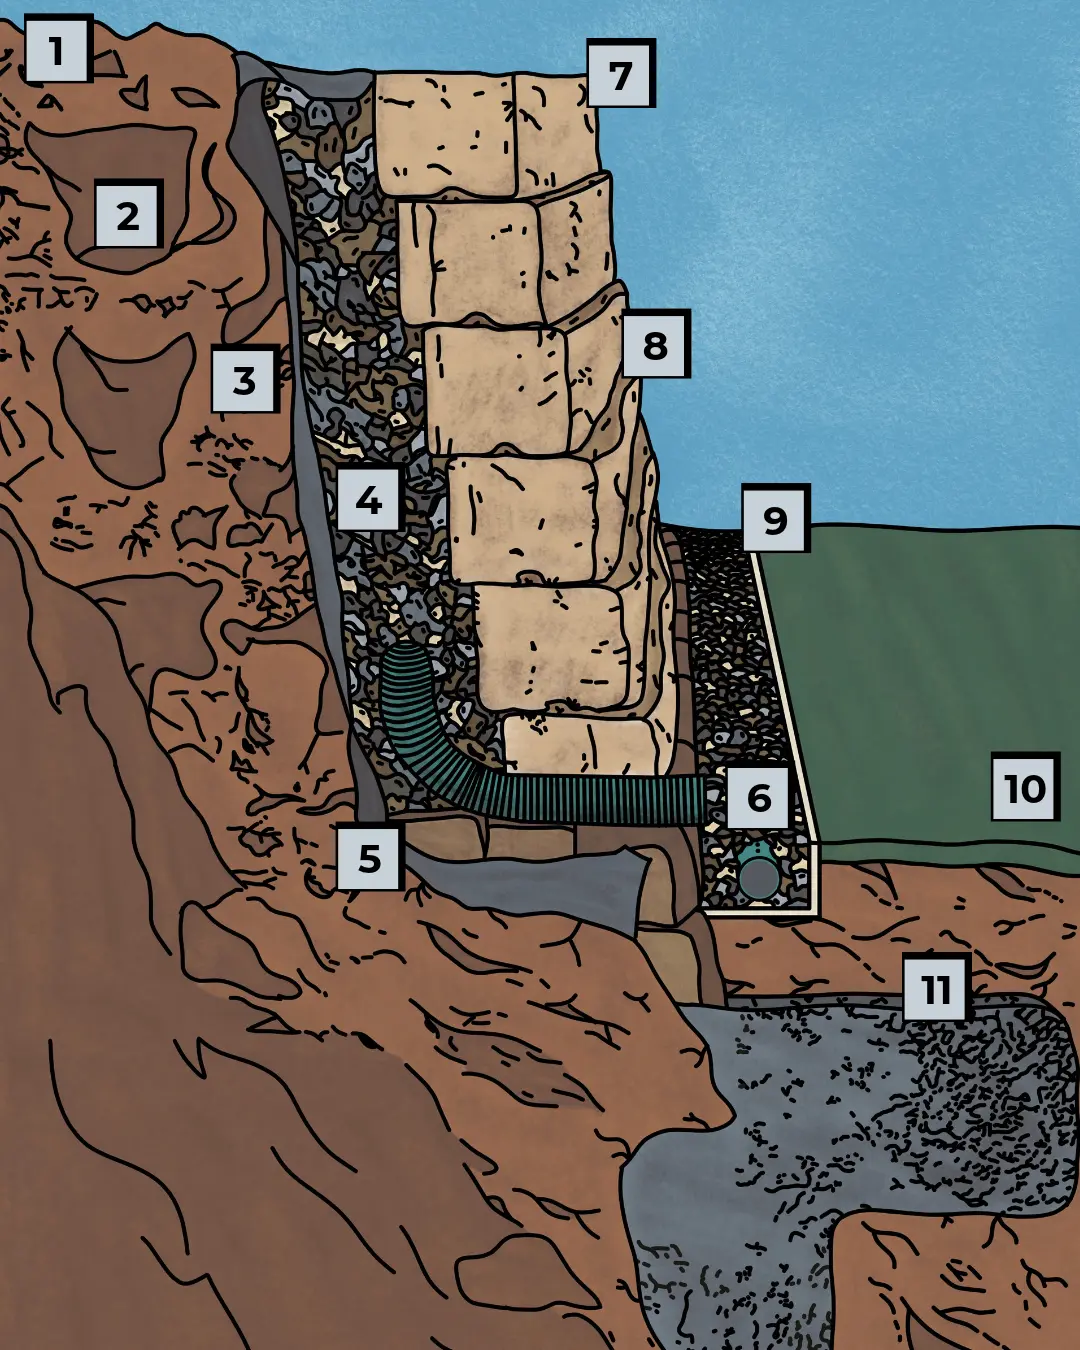
Image credit: Olivia Mungham-Gray
1. Top Level of the Terrace (Soil Surface)
The uppermost level of the terraced garden, where the water’s journey begins. This is one of the first points of contact for rainfall, with water either soaking into the soil or travelling across the surface towards the retaining wall and its drainage system.
2. Compacted Backfill Soil
Backfill refers to material used to refill an area that has previously been excavated. In this example, soil removed during the retaining wall’s construction has been returned to the space behind the wall and compacted to provide a stable, suitably prepared ground surface.
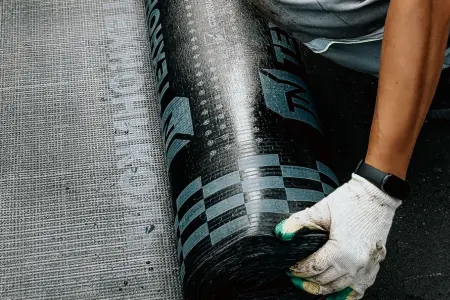
3. Geotextile Membrane
A permeable geotextile membrane is used to separate the surrounding backfill soil from the aggregate drainage area. Its purpose is to act as a filter, allowing water to pass through while preventing fine soil particles from entering the drainage aggregate. Without this separation, soil particles can gradually accumulate within the aggregate, reducing the gaps between stones and restricting the movement of water.
Over time, this can affect the efficiency of the drainage system and increase the risk of blockages. The membrane is typically positioned between the natural soil and the free-draining aggregate, helping to maintain the permeability of the drainage layer and allowing water to reach the drainage pipe freely. It is important to use a suitable permeable geotextile membrane rather than an impermeable damp-proof membrane, as the aim is to filter out soil particles without preventing water from entering the drainage zone.
4. Aggregate Backfill Area
A space behind the retaining wall filled with free-draining aggregate, such as gravel or crushed stone. This allows water to travel down towards the perforated drainage pipe rather than becoming trapped against the wall. Not all of the water will necessarily reach the pipe. The gaps between the retaining blocks also provide a route for excess water to escape, helping to prevent pressure from building up behind the structure.
5. Foundation Blocks Below Ground
The foundation blocks extend below the surrounding ground level to provide support for the retaining wall. They help transfer the weight of the structure and the forces acting upon it into the underlying ground. Surface soils can often be loose, soft or affected by weather, so establishing suitable support in stable ground is important for the wall’s long-term stability. The required foundation depth and construction will depend on the wall’s design and ground conditions.
6. Perforated Flexible Drainage Pipes
These pipes collect and redirect excess water, helping to prevent it from accumulating behind the retaining wall. Two separate drainage pipes are shown in the diagram, each serving a different purpose.
- The upper drainage pipe is positioned within the aggregate backfill area; this perforated pipe collects water as it drains down through the aggregate. Water enters through the holes along the pipe before being carried safely through and beyond the retaining wall blocks.
- The lower drainage pipe is positioned within the gravel trap at the base of the retaining wall; this second pipe collects water reaching the lower terrace and directs it towards a designated discharge point, such as a soakaway.
Together, these pipes provide two stages of water collection and management, helping to move excess water away from the retaining wall and surrounding garden.
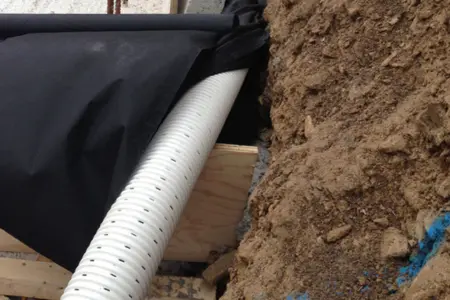
Image credit: Silverspray.co.uk
7. Retaining Wall Blocks
The blocks form the main structure of the retaining wall, holding back the surrounding soil and helping to establish the different levels of the terraced garden. In this example, the blocks have been laid with small gaps between them to allow excess water to escape from the aggregate backfill area.
Blocks are not the only material that can be used to construct a retaining wall. Timber sleepers offer a more natural appearance and can be used to create structured retaining walls, raised beds and terraced areas. When used, a suitable protective membrane between the timber and aggregate backfill can help limit prolonged moisture exposure and extend the timber’s lifespan.
For a more contemporary finish, gabion baskets provide an alternative. These consist of wire cages filled with stone, creating a distinctive, permeable retaining structure. Natural stone is another option, offering a timeless appearance that works particularly well in traditional or naturalistic garden designs. It can be used to create both mortared walls and dry-stone structures.
Alternatively, concrete blocks offer a versatile and durable construction option. They can be left exposed or finished with render, paint or cladding to complement the surrounding garden. Ultimately, the most appropriate material will depend on the wall’s height, structural requirements, ground conditions and desired appearance.
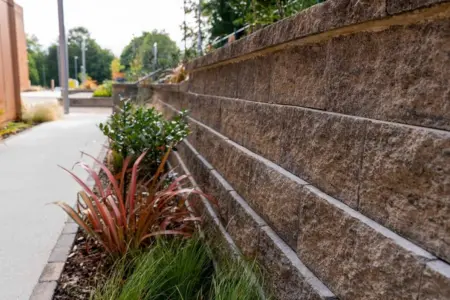
Image credit: Tobermore.co.uk
8. Gaps Between the Blocks
The small gaps between the retaining wall blocks provide an escape route for water that has entered the aggregate backfill but hasn’t made its way into the perforated drainage pipe. Allowing this water to seep through helps relieve excess hydrostatic pressure (the pressure created by water building up behind the wall), reducing the strain placed on the structure. The size and positioning of these openings need to be considered as part of the wall’s design to ensure drainage is achieved without allowing excessive soil loss or compromising stability.
9. Gravel Trap (French Drain)
Positioned at the base of the retaining wall, the gravel trap, also known as a French drain, collects water that has travelled down from the upper terrace. This includes water discharged from the upper perforated drainage pipe, as well as water that has flowed over or seeped through the retaining wall blocks.
The gravel provides a free-draining collection area, helping to move water towards the lower drainage system. In this example, a second perforated pipe is included within the gravel trap to collect and direct the water away towards a designated overflow or discharge area, such as a soakaway. Although a perforated pipe isn’t essential for every French drain design, incorporating one can improve water collection and provide a more controlled route for removing excess water.
10. Lower Terrace (Surface Level)
In the diagram, the lower terrace is shown as a lawn. However, this area could be designed for a variety of purposes depending on how the garden will be used. With suitable drainage systems in place to manage water from the retaining wall, the lower terrace could also accommodate a hardstanding feature, such as a patio, seating area or pathway. This creates greater flexibility in the overall garden design.
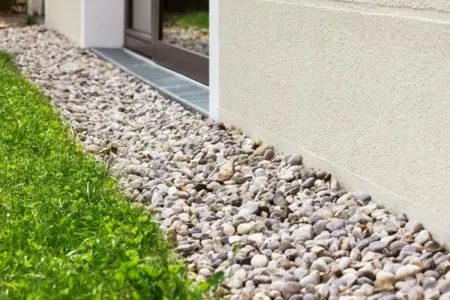
Image credit: Maryana Serdynska
11. Concrete Foundation
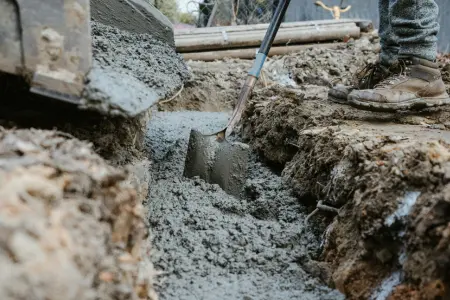
The concrete foundation, or footing, provides the structural support needed to keep the retaining wall stable. It helps distribute the weight of the wall and the forces exerted by the retained soil across the underlying ground, reducing the risk of movement, settlement or cracking.
Several factors need to be considered when constructing a suitable foundation. The width and depth of the footing will depend on the wall’s height, thickness, ground conditions and the loads it needs to support. Footings are often wider than the wall itself, helping to provide a stable base, although there is no single size suitable for every retaining wall.
Steel reinforcement may also be required, particularly for structural concrete and masonry retaining walls. Reinforcement bars (rebar) are incorporated into the footing and, where specified, extend into the wall itself. This helps the structure withstand the forces acting upon it, with the reinforcement layout determined by the structural design.
Before the concrete is poured, the sub-base must be properly prepared. This may involve laying and compacting a layer of Type 1 MOT or suitable crushed stone at the bottom of the excavation. This provides a firm, even surface for the concrete, with the required thickness depending on the ground conditions and design.
Finally, the footing must be designed to distribute the loads effectively. By spreading the weight of the wall and the pressure from the retained soil over a suitable area, the foundation helps prevent excessive pressure on the underlying ground. Extending the footing beyond the wall’s footprint can further improve load distribution and overall stability.
Foundation dimensions, concrete thickness and reinforcement requirements should always be determined by a suitable structural design. These will vary depending on the wall’s height, construction materials, soil conditions, water pressure and any additional loads nearby, such as vehicles, buildings or paved areas.
For a closer look at the different types of retaining walls, the materials available and how to incorporate them into your garden design, read our blog, Retaining Walls for Sloping Norfolk Gardens.
How Garden Wall Drainage Systems Work
When designing a terraced garden, managing water is an important part of ensuring the retaining walls remain stable and perform as intended. Whether it comes from rainfall or another source, water needs a clear route through and around the structure to prevent it from building up behind the walls and creating excess pressure.
As the video demonstrates, water reaches the uppermost level of the terraced garden, where it can follow several different routes. Some will naturally soak into the surrounding soil, while other water may run across the surface, flow over the retaining wall blocks or enter the aggregate backfill behind the wall.
Water that enters the aggregate backfill can gradually make its way down towards a perforated, flexible drainage pipe. Small holes along the pipe allow water to enter, where it is then carried safely through and beyond the retaining wall to the lower level of the garden. Any water that doesn’t reach the pipe can still escape through the drainage gaps between the blocks, helping to prevent unwanted water pressure from building up behind the structure.
Once past the retaining wall, water is collected by a gravel trap, also known as a French drain, positioned at the base of the wall. This provides another route for collecting and managing excess water, with a second perforated drainage pipe directing it away towards a designated discharge point, such as a soakaway.
By incorporating multiple drainage routes into the design, water can move through the different levels of the garden rather than becoming trapped behind the retaining walls. This is an important consideration in retaining wall construction, helping to manage water pressure and protect the long-term stability of the structure.
Video credit: Olivia Mungham-Gray
Choosing the Right Drainage Materials
Once you understand how water needs to move through and away from a retaining wall, the next consideration is choosing the right drainage materials. The materials used will depend on the wall’s construction, its height, the surrounding ground conditions and the volume of water that needs to be managed. In most cases, a combination of materials is used to collect, filter and direct water away from the structure.
Gravel and Crushed Stone
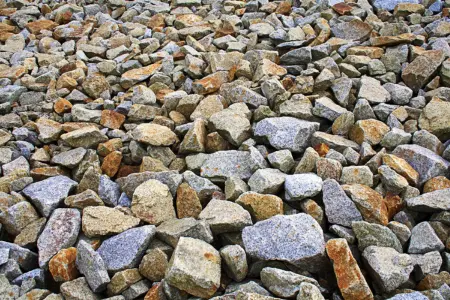
Gravel and crushed stone are commonly used to create a free-draining layer directly behind a retaining wall. Unlike ordinary garden soil, which can retain considerable amounts of moisture, coarse aggregate allows water to pass through the spaces between individual stones. This helps prevent water from becoming trapped against the back of the structure.
The drainage aggregate is typically placed behind the wall, often around a perforated drainage pipe, creating a permeable area through which excess water can travel. The size and type of aggregate will depend on the drainage design, but clean, washed stone is generally preferred because it contains fewer fine particles that could restrict water movement.
Perforated Drainage Pipes
A perforated drainage pipe is one of the main components of many retaining garden wall drainage systems. Positioned near the base of the wall, these pipes collect water as it moves through the surrounding drainage aggregate. Small openings along the pipe allow water to enter before being carried towards a suitable drainage outlet.
A retaining garden wall drainage pipe is commonly installed with a slight gradient to encourage water to flow towards its intended discharge point. The pipe should be selected according to the drainage requirements, with consideration given to its diameter, material, perforation pattern and expected water volume. Perforated pipes are often made from durable plastic materials, such as PVC or HDPE, which are suitable for underground installation.
Geotextile Membrane
Geotextile membrane is used to separate different soil and drainage materials while still allowing water to pass through. When installed correctly, it helps prevent fine particles from the surrounding soil from entering the gravel drainage layer and gradually clogging the system. This is particularly useful in gardens with clay-heavy or silty soils, where smaller particles can easily migrate into the drainage aggregate.
The membrane is generally positioned between the natural soil and the free-draining material, although its exact placement will depend on the drainage design. It is important to select a suitable permeable geotextile rather than an impermeable landscaping membrane, as the objective is to allow water through while filtering out unwanted soil particles.

Drainage Boards and Waterproofing Membranes
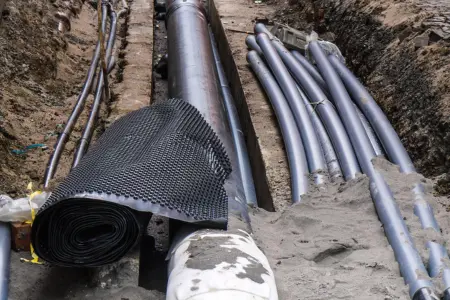
Drainage boards can provide an additional layer of protection between the retained soil and the back of the wall. These boards typically feature a dimpled or structured surface that creates a small drainage cavity. Water can travel down this space towards the drainage system at the base of the wall.
Depending on the construction method, drainage boards may be installed alongside a waterproofing or damp-proof membrane. It is important to understand that these products perform different functions. Waterproofing membranes help protect the wall from moisture penetration, while drainage boards provide a pathway for water to move downwards. For walls constructed from concrete or masonry, these materials can form part of a wider moisture-management strategy.
French Drains
A French drain is another term used for a gravel trap and is another effective option for managing groundwater around retaining walls. Typically consisting of a perforated pipe surrounded by free-draining gravel and wrapped or separated using a suitable geotextile filter, a French drain collects excess water and directs it towards a suitable outlet.
A French drain for garden retaining wall drainage can be particularly useful where water naturally travels towards the structure from higher ground or where the surrounding soil has poor drainage characteristics. The system can be installed directly behind the wall or incorporated into a wider garden drainage scheme, depending on the site conditions and construction requirements.
When choosing materials, it is important to consider how each component works alongside the others. A drainage pipe, for example, will only function effectively if water can reach it through the surrounding aggregate and the system has somewhere suitable to discharge.
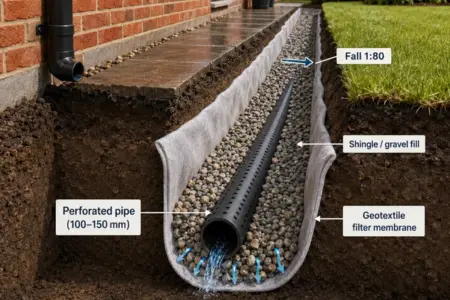
Image credit: Nordicdampproofing.co.uk
Where Does the Water Go? Understanding Drainage Outlets
Collecting excess water behind a retaining wall is only half the job. Once water enters the drainage system, it needs somewhere to go. The drainage outlet is therefore just as important as the materials used to collect and transport the water. Without a suitable discharge point, water can simply accumulate elsewhere, potentially creating further drainage problems. There are several ways water can be discharged from a retaining wall drainage system, depending on the site layout, ground conditions and available drainage infrastructure.
Connecting to an Existing Surface Water Drain
Where suitable infrastructure is available, the retaining wall drainage system may be connected to an existing surface water drainage network. This provides a controlled route for collected water to leave the garden rather than allowing it to accumulate around the structure.
However, connections to existing drainage systems must be properly assessed. Permission or approval may be required, and it is important to establish that the existing system has sufficient capacity to accommodate the additional water. Foul drainage systems should not be used for surface water unless specifically designed and authorised for that purpose.
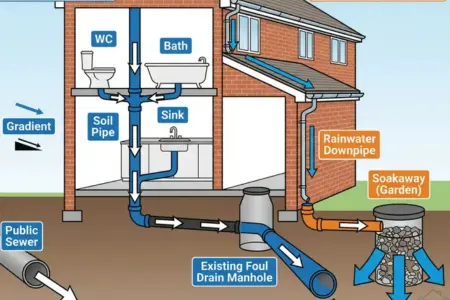
Image credit: Buildwiz.uk
Discharging into a Soakaway
A soakaway is an underground structure designed to collect excess surface water and allow it to gradually infiltrate into the surrounding ground. It can be a useful solution for properties without access to a suitable surface water drainage connection. Water from the retaining wall drainage pipe can be directed towards a soakaway, where it is temporarily stored before dispersing into the surrounding soil.
However, soakaways are not suitable for every garden. Their effectiveness depends heavily on soil permeability, groundwater levels and available space. For example, heavy clay soils may absorb water too slowly to make a traditional soakaway effective. A percolation test and assessment of groundwater conditions may be necessary before installation. Soakaways must also be positioned appropriately, away from building foundations and other vulnerable structures.
Discharging Through a Drainage Outlet
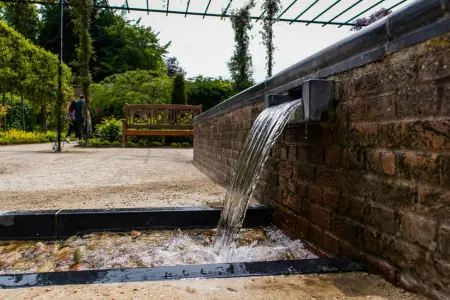
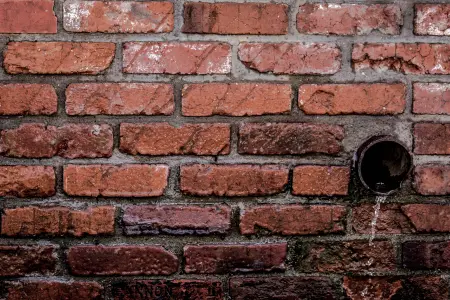
Some retaining wall designs incorporate dedicated drainage outlets or weep holes. These provide openings through the wall that allow collected water to escape from behind the structure. Weep holes are often positioned at regular intervals along the lower section of the wall, allowing water to discharge onto the lower side of the garden.
They can be particularly useful for masonry and concrete retaining walls, although their positioning and design must be considered as part of the overall construction. It is important to ensure that the outlets remain unobstructed and that discharged water does not create erosion, pooling or problems for neighbouring properties.
Connecting to a Wider Garden Drainage System
In some gardens, the most effective solution is to incorporate the retaining wall drainage into a wider garden drainage scheme. For example, a garden with several levels may already have drainage channels, underground pipes or other systems designed to manage surface water.
Connecting the retaining wall drainage to this wider network can help create a more coordinated approach to water management. However, the system must be designed to accommodate the combined volume of water. Simply directing additional water into an existing pipe or drainage feature without checking its capacity can create problems further down the line.
An important consideration: Water should never simply be directed onto neighbouring land, public footpaths or areas where it could cause flooding or erosion. The final discharge point must be suitable, lawful and capable of handling the expected water volume.
Common Retaining Wall Drainage Problems
Even a well-constructed retaining wall can experience drainage problems over time, particularly if the drainage system has not been designed correctly or is not maintained. Understanding the common issues can help you identify potential problems early and prevent more serious structural damage.
Blocked Drainage Pipes
One of the most common problems is a blocked or restricted drainage pipe. Over time, soil particles, silt, roots and other debris can enter the drainage system, gradually reducing the space available for water to flow through.
If the pipe becomes blocked, water can begin to accumulate behind the wall, increasing pressure against the structure. Using suitable filter materials and geotextile membranes during installation can help reduce the risk of blockages. Regular inspections and maintenance are also important.
Poorly Positioned Drainage Outlets
Even when a drainage pipe is working correctly, a poorly positioned outlet can prevent water from escaping effectively. For example, if the discharge point is too high, water may remain trapped within the drainage system. Similarly, if the pipe does not have a sufficient gradient, water may struggle to flow towards the outlet. The outlet should be carefully planned to ensure water can leave the system freely and safely.
Inadequate Drainage Aggregate
Using unsuitable materials behind a retaining wall can restrict the movement of water. Fine aggregates or ordinary garden soil may compact over time, reducing the spaces through which water can travel. This can prevent water from reaching the drainage pipe efficiently, even if the pipe itself is functioning correctly. Using clean, suitably graded drainage aggregate helps maintain permeability and supports the long-term performance of the system.
Incorrect Drainage Installation
The positioning and installation of drainage components are just as important as the materials themselves. A pipe installed without the correct gradient, a poorly fitted membrane or insufficient drainage aggregate can all affect how effectively the system works. These problems are particularly difficult to identify once the wall has been completed and the surrounding soil has been reinstated. This is why it is important to consider drainage during the initial construction rather than attempting to address it as an afterthought.
Water Pooling Behind the Wall
Persistent water pooling behind a retaining wall can indicate that the drainage system is not working as intended. This may be caused by blocked pipes, poor soil permeability, an inadequate drainage outlet or an undersized system. Signs to look out for include unusually wet ground, standing water, water escaping through unexpected areas of the wall and persistent damp patches. If water begins to accumulate, it is important to investigate the cause before additional pressure leads to structural movement.
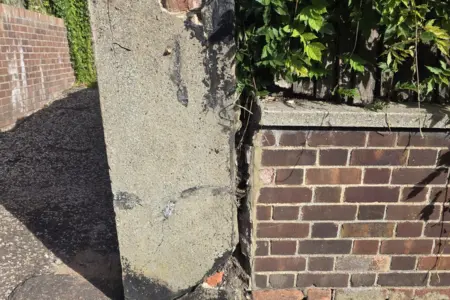
Cracking, Bulging or Leaning
Visible changes to the retaining wall can indicate a more serious underlying problem. Cracks, bulging sections or a wall that appears to be leaning may be signs that the structure is experiencing excessive pressure. Although these symptoms can have several causes, poor drainage and water build-up should always be considered.
If you notice significant movement or structural changes, seek advice from a suitably qualified structural engineer or retaining wall specialist. Simply adding drainage may not resolve an existing structural issue.
Planning and Installing a Retaining Wall Drainage System
A successful retaining wall drainage system starts with careful planning. Although the principles of drainage are relatively straightforward, every garden is different. Soil conditions, ground levels, rainfall exposure and the proposed wall construction will all influence the type of drainage required. Here are some of the main considerations when planning and installing drainage behind a garden wall.
Assess the Ground Conditions
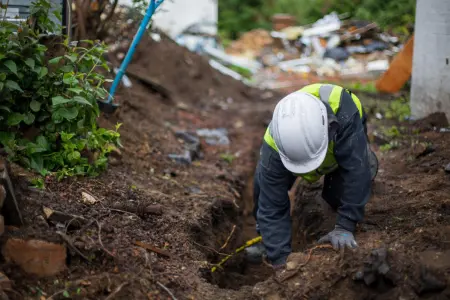
Before construction begins, it is important to understand the ground conditions surrounding the proposed retaining wall. Different soil types have different drainage characteristics. Sandy and gravelly soils generally allow water to pass through relatively easily, whereas clay soils can retain moisture for much longer.
The natural slope of the garden should also be considered, particularly if water is likely to travel towards the retaining wall from higher ground. Where necessary, a site investigation or drainage assessment can help establish the most suitable approach.

Image credit: Marshallgeo.com
Consider the Wall’s Height and Construction
The height, materials and structural design of the retaining wall will influence its drainage requirements. A small decorative wall retaining a shallow planting bed may have relatively straightforward drainage needs. A taller wall supporting a significant volume of soil will require much more careful consideration.
The wall’s construction details should account for the expected water pressure, the drainage materials required and the location of any pipes or outlets. For taller or heavily loaded retaining walls, drainage should form part of the engineered structural design rather than being treated as a separate landscaping consideration.
Plan the Drainage Route Before Construction
One of the most important steps is deciding where the water will go before the wall is built. Consider the location of the drainage pipe, its route through the garden and the final discharge point. The system needs to have a continuous route for water to travel, with an appropriate gradient and no unnecessary restrictions.
It is also worth considering whether the drainage can be incorporated into an existing garden drainage network or whether a separate outlet or soakaway will be needed. Planning this can prevent unnecessary excavation and modifications once construction is underway.

Install the Drainage Components Correctly
Once the drainage design has been established, the different components can be incorporated into the wall construction. A typical installation may involve the following steps:
- Excavating the area behind the proposed wall, allowing sufficient room for the structural foundation and drainage components.
- Installing protective membranes where required and applying suitable waterproofing and drainage protection to the rear face of the wall.
- Positioning the drainage pipe and installing the perforated drainage pipe near the base of the wall, ensuring it follows the designed route and gradient towards the outlet.
- Adding drainage aggregate and surrounding the pipe, providing the specified depth of clean, free-draining aggregate behind the wall.
- Install a geotextile membrane and separate the drainage aggregate from the surrounding soil using a suitable permeable filter membrane.
- Connecting the outlet, ensuring that the drainage pipe connects to the intended discharge point, and that water can leave the system freely.
- Backfilling carefully and reinstating the surrounding soil in accordance with the wall’s structural design, taking care not to damage the drainage components.
The precise installation method will vary depending on the wall construction, drainage design and ground conditions. It is particularly important that the drainage system is inspected before backfilling. Once the soil has been reinstated, many of its components will be hidden from view and much more difficult to access. Assessment is an important step in enabling your garden wall’s durability and future practicality.
Don’t Overlook Future Garden Wall Maintenance
Even a properly installed drainage system requires occasional checks to ensure it continues to work effectively. Drainage outlets should be kept clear of leaves, soil and other debris, while accessible inspection points can make it easier to identify potential blockages.
If the garden is particularly prone to heavy rainfall or soil movement, more frequent inspections may be beneficial. Keeping a record of where underground drainage pipes and connections have been installed can also prove useful for future landscaping work or maintenance.
Professional advice matters: Retaining walls are structures that must safely resist the pressure of the ground they support. For taller walls, walls supporting buildings or driveways, or those with complex ground conditions, drainage and structural design should be undertaken by appropriately qualified professionals. In England, retaining walls may also require Building Regulations consideration depending on their design and circumstances.
Commonly Asked Questions About Garden Wall Drainage Systems
Does every garden retaining wall need drainage?
Not every retaining wall will require the same drainage arrangement, but water management should always be considered during the design process. The need for drainage will depend on factors such as wall height, soil type, ground conditions and the amount of water likely to collect behind the structure.
Where there is a risk of water accumulating, an appropriate drainage system is essential to help prevent excessive pressure and protect the wall’s structural stability.
How do you drain a retaining wall?
The most common approach is to install a perforated drainage pipe near the base of the wall, surrounded by clean drainage aggregate. Water moves through the surrounding soil and into the free-draining material before entering the pipe.
It is then carried towards a suitable outlet, such as an approved surface water connection or appropriately designed soakaway. The exact method will depend on the wall’s construction and the surrounding ground conditions.
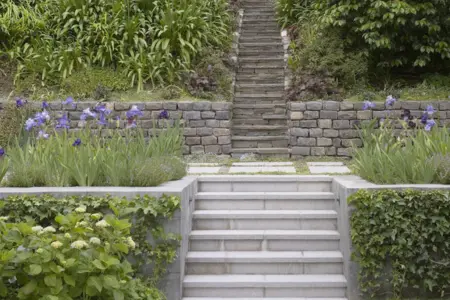
Image credit: Gardenista.com
What is the best drainage system for a garden retaining wall?
There is no single drainage solution that works for every garden. However, a combination of perforated drainage pipe, clean gravel or crushed stone and a permeable geotextile membrane is commonly used to manage water behind retaining walls.
For some gardens, a French drain may also be suitable, particularly where groundwater needs to be collected and redirected away from the structure. The best solution will depend on the site’s soil conditions, water volume, wall design and available discharge points.
Should I use a French drain for a garden retaining wall?
A French drain can be an effective option for managing groundwater around a retaining wall. It typically consists of a perforated pipe surrounded by drainage aggregate, with a filter membrane helping to prevent soil particles from entering the system.
However, it is important to ensure that the French drain is correctly positioned, appropriately sized and connected to a suitable outlet. It should also form part of the wider retaining wall drainage design rather than being treated as a standalone solution.
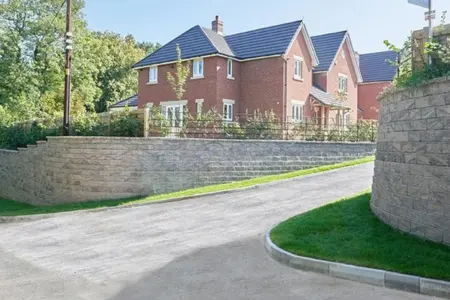
Image credit: Tobermore.co.uk
How deep should a drainage pipe be behind a retaining wall?
The depth and positioning of a retaining garden wall drainage pipe will depend on the structural design of the wall and the drainage requirements. In many installations, the perforated pipe is positioned near the base of the wall so that it can collect water from the drainage aggregate behind it.
However, there is no universal installation depth. The pipe must be positioned to collect water effectively without compromising the wall’s foundations or structural stability.
Can I install drainage behind an existing retaining wall?
It is possible to improve drainage behind an existing retaining wall, but it can be more complicated than incorporating it during the original construction. Depending on the problem, solutions may include installing surface drainage channels, improving the drainage of the surrounding ground, or carefully excavating to introduce additional drainage components.
However, excavating behind an existing retaining wall can affect its stability. If the wall is already showing signs of movement, cracking or bulging, professional advice should be sought before any work begins.
What happens if a retaining wall has no drainage?
Without adequate drainage, water can accumulate behind the wall and create additional pressure against the structure. Over time, this may contribute to cracking, bulging, leaning or structural failure. The risk is particularly high in areas with heavy clay soils, poor natural drainage or significant rainfall. This is why drainage should always be considered as part of the initial retaining wall construction details.
Image credit: Tobermore.co.uk
Conclusion
When designing and constructing a garden retaining wall, drainage is just as important as the materials and structural elements used to build it.
Without an effective system for managing excess water, even a well-constructed wall can become vulnerable to increased pressure, movement and long-term deterioration.
By understanding how water travels through the ground, selecting appropriate drainage materials and planning a suitable outlet, you can help protect the structure and ensure it performs as intended.
Every garden presents different challenges, which is why drainage should always be tailored to the individual site. From choosing the right aggregate and installing a perforated drainage pipe to considering the benefits of a French drain, getting these details right from the beginning can make a significant difference.
At Norfolk Garden Services, we understand that successful landscaping is about more than what you see on the surface. Careful planning and attention to the details beneath the ground help create outdoor spaces that are both attractive and built to last.
If you’re considering a garden retaining wall as part of your next landscaping project, get in touch with our team to discuss your ideas and how we can help bring your garden to life.
References
Further Reading
Retaining Walls for Sloping Norfolk Gardens
Water Management 101: Vital Role of Garden Drainage Solutions